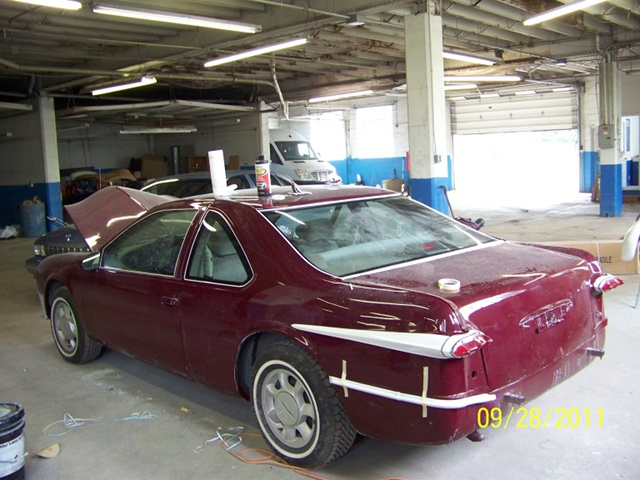
Rebuilding
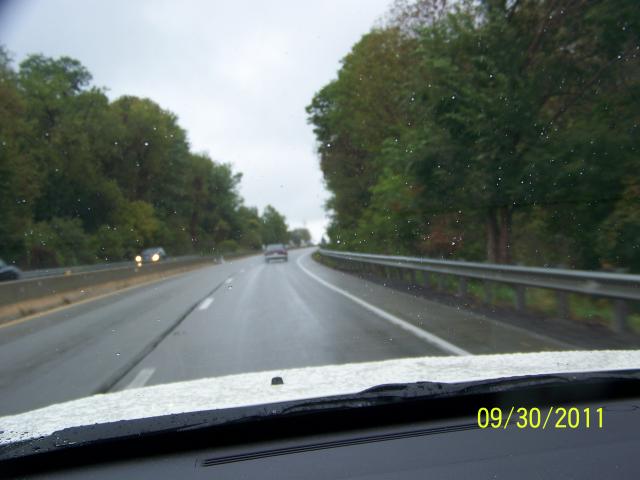
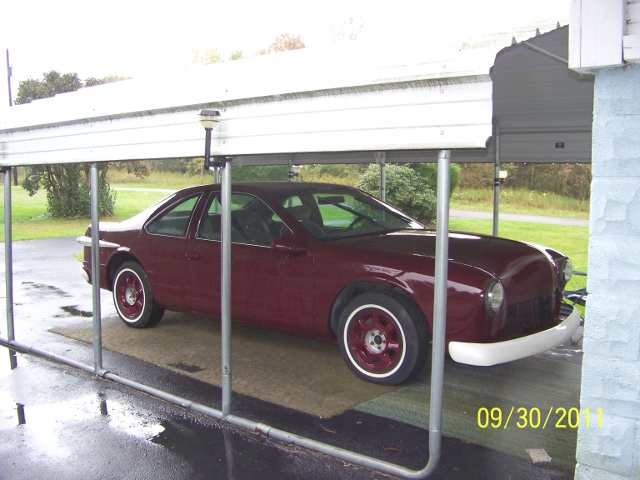
T-bird going home in the rain.
[Note: right click any picture and then click view image for a larger image.]
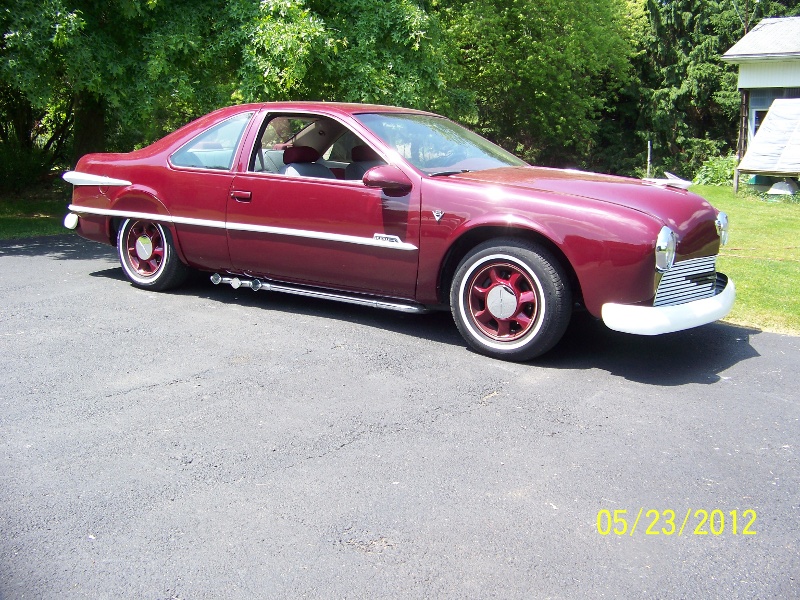
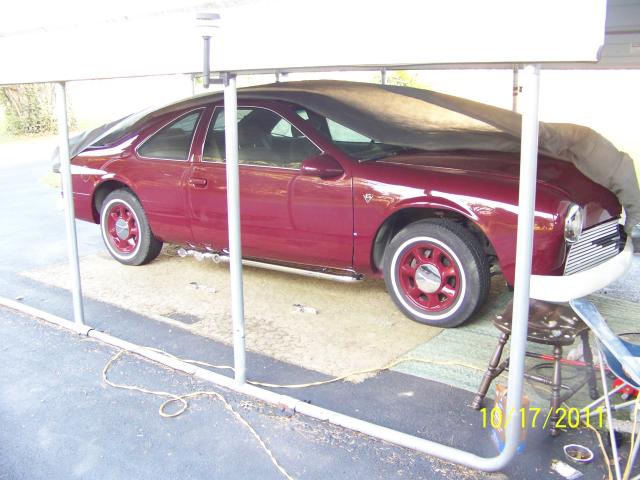
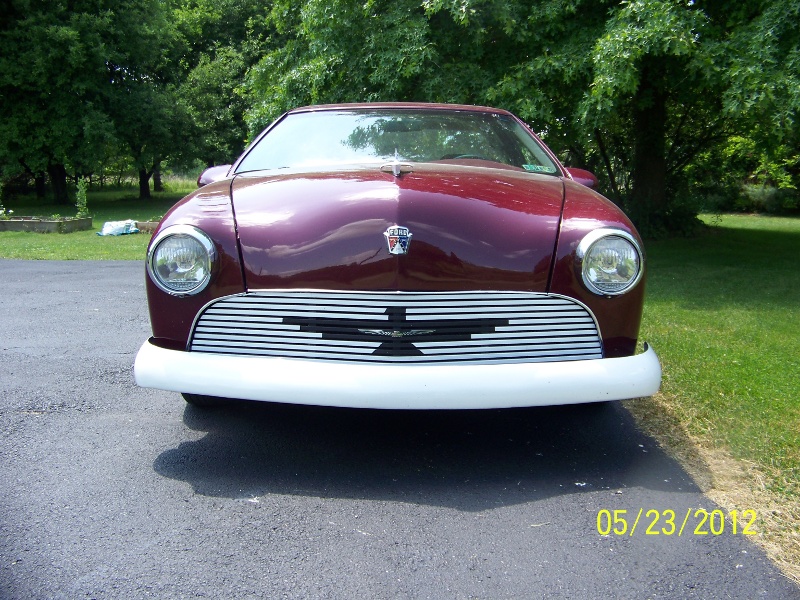
The “T-bird” is now (9/30/2011) home after painting and I will start putting it back together. During the painting phase Greg and I decided on a few changes. The black plastic trim around all the windows was painted body color and the original Thunderbird wheels were also painted body color. The windows have been outlined using a white pinstripe. These changes have really enhanced the “old school” look of the car. It was raining when we took the car home and when the pictures were taken. I'll have better pictures later.
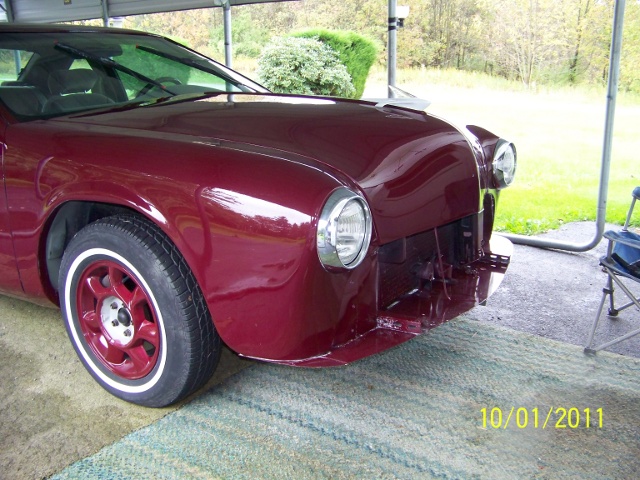
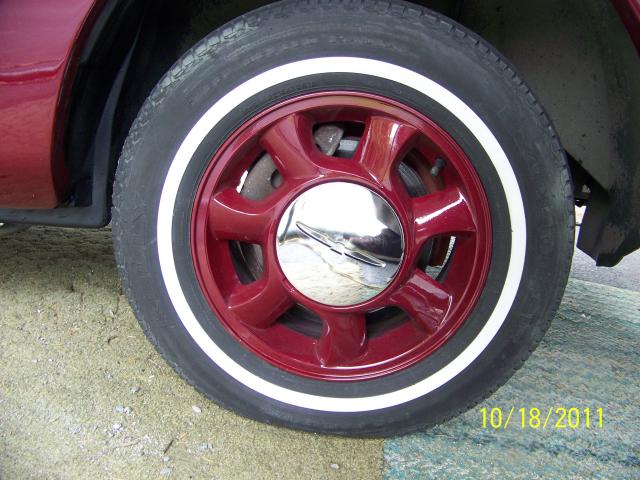
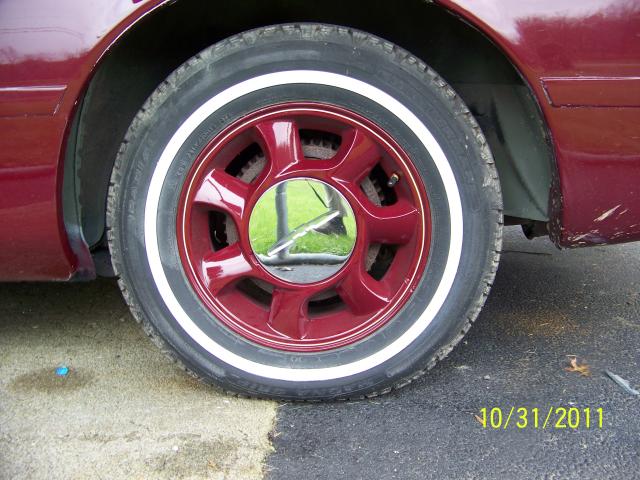
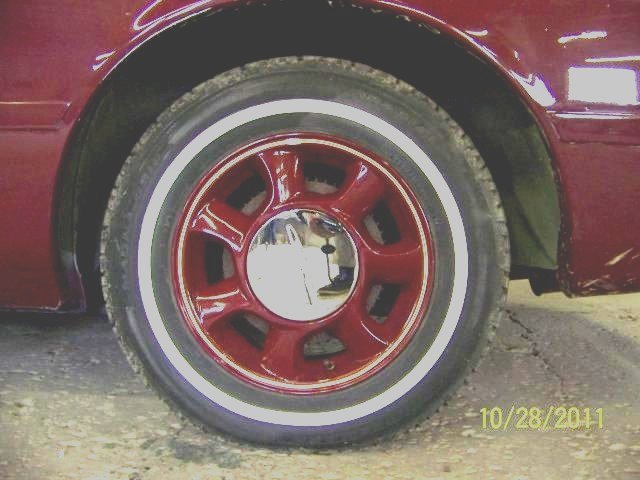
I have a set of chrome centers for the wheels. We are planning a dark yellow pinstripe for the outer rim of the wheels. I got the car home and on one of the coldest wettest day of the year since April so I haven't done much yet. I did get the K&N air cleaner back on. I had to warm the end to get it to fit -- Brrr--. I also have the headlight rims and the hood ornament installed.
The area behind where the grille goes needs to be painted flat black so it can't be seen through the grille.
10/4/2011
I painted the area behind the grille and installed the cover in front of the radiator.
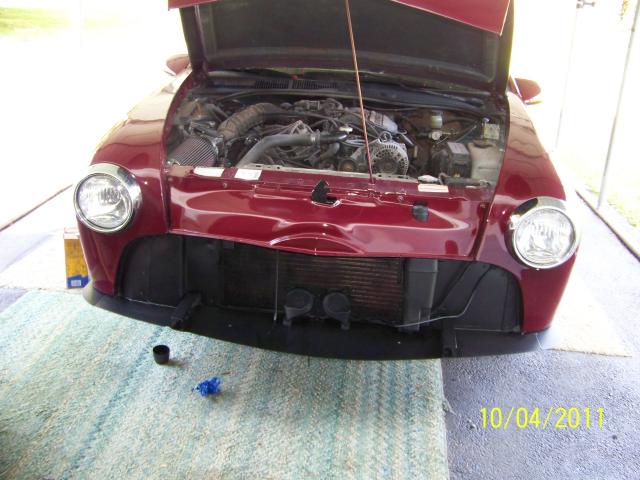
Next the grille and bumper.
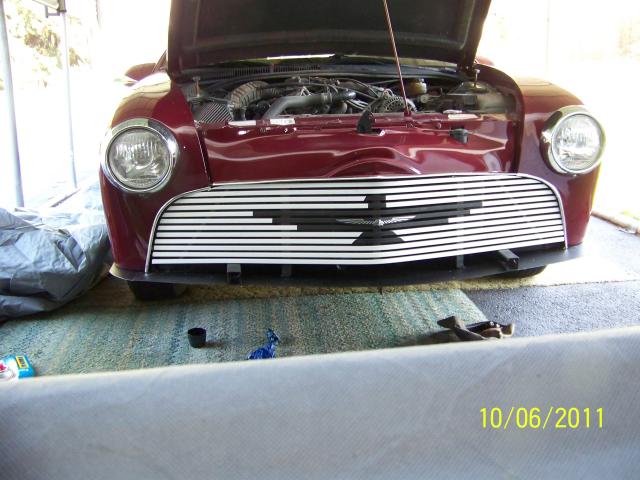
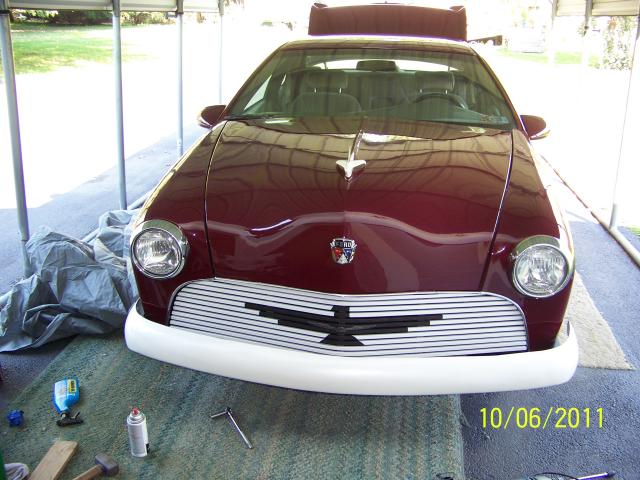
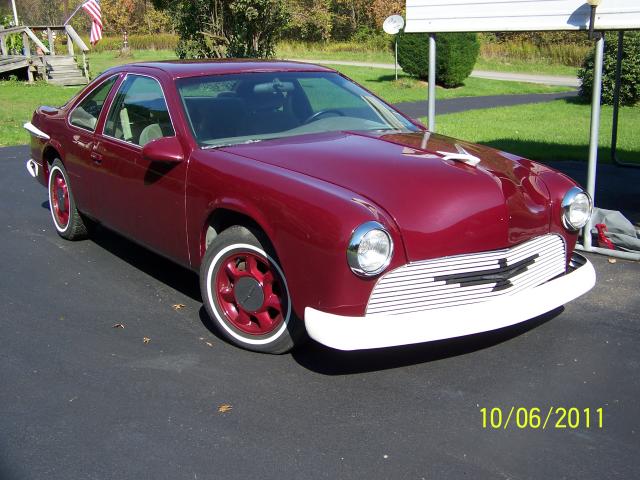
10/6/2011
The grille is installed and then the bumper. It is starting to look like a car. The emblem is not really mounted yet as the fiberglass hood is too thick for the mounting legs. Gluing is not really practical because the padding to keep the emblem in place in the frame would push it off the hood.
Here it is out in the sun and you can also see the chrome wheel centers. The dark yellow pinstripe on the wheel rim should look good.
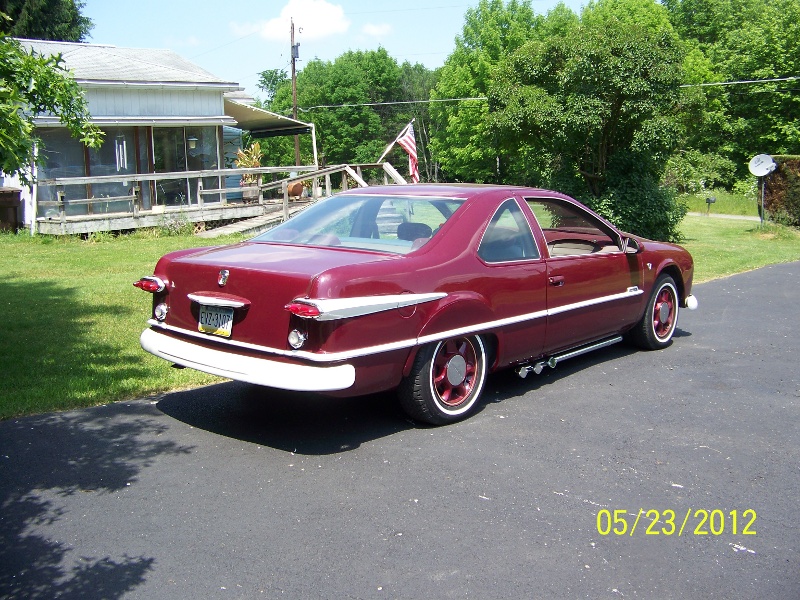
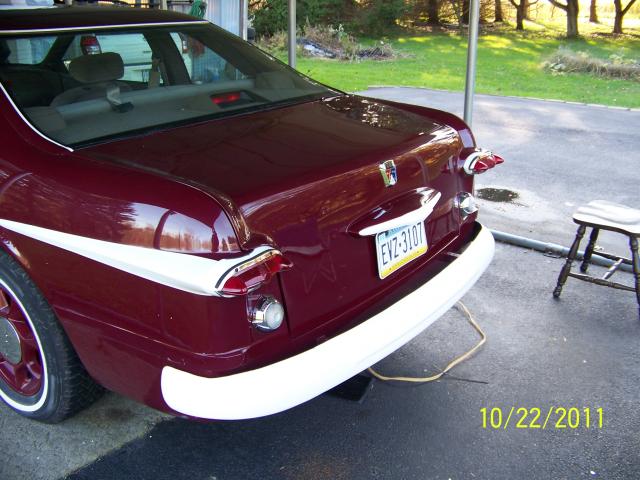
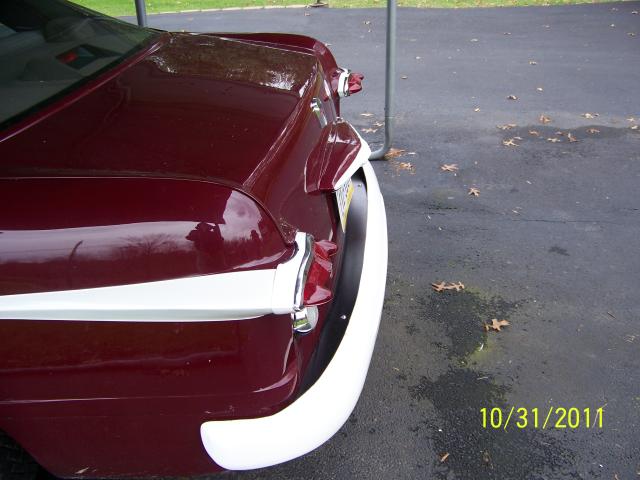
I have managed to improve the appearance of the rear bumper. I had a problem mounting this bumper from the beginning and had finally decided that mounting it upside down was the best solution in order to get sufficient clearance at the ends. While this worked the bumper just did not look right the ends drooped and the middle humped up. As I was working on mounting the the bumper I decided that I needed more clearance on the lower edge to keep it from hitting the fender. After increasing this clearance I discovered that I could turn it right-side up and mount it under stubs and telescoping these into the stubs on the car.
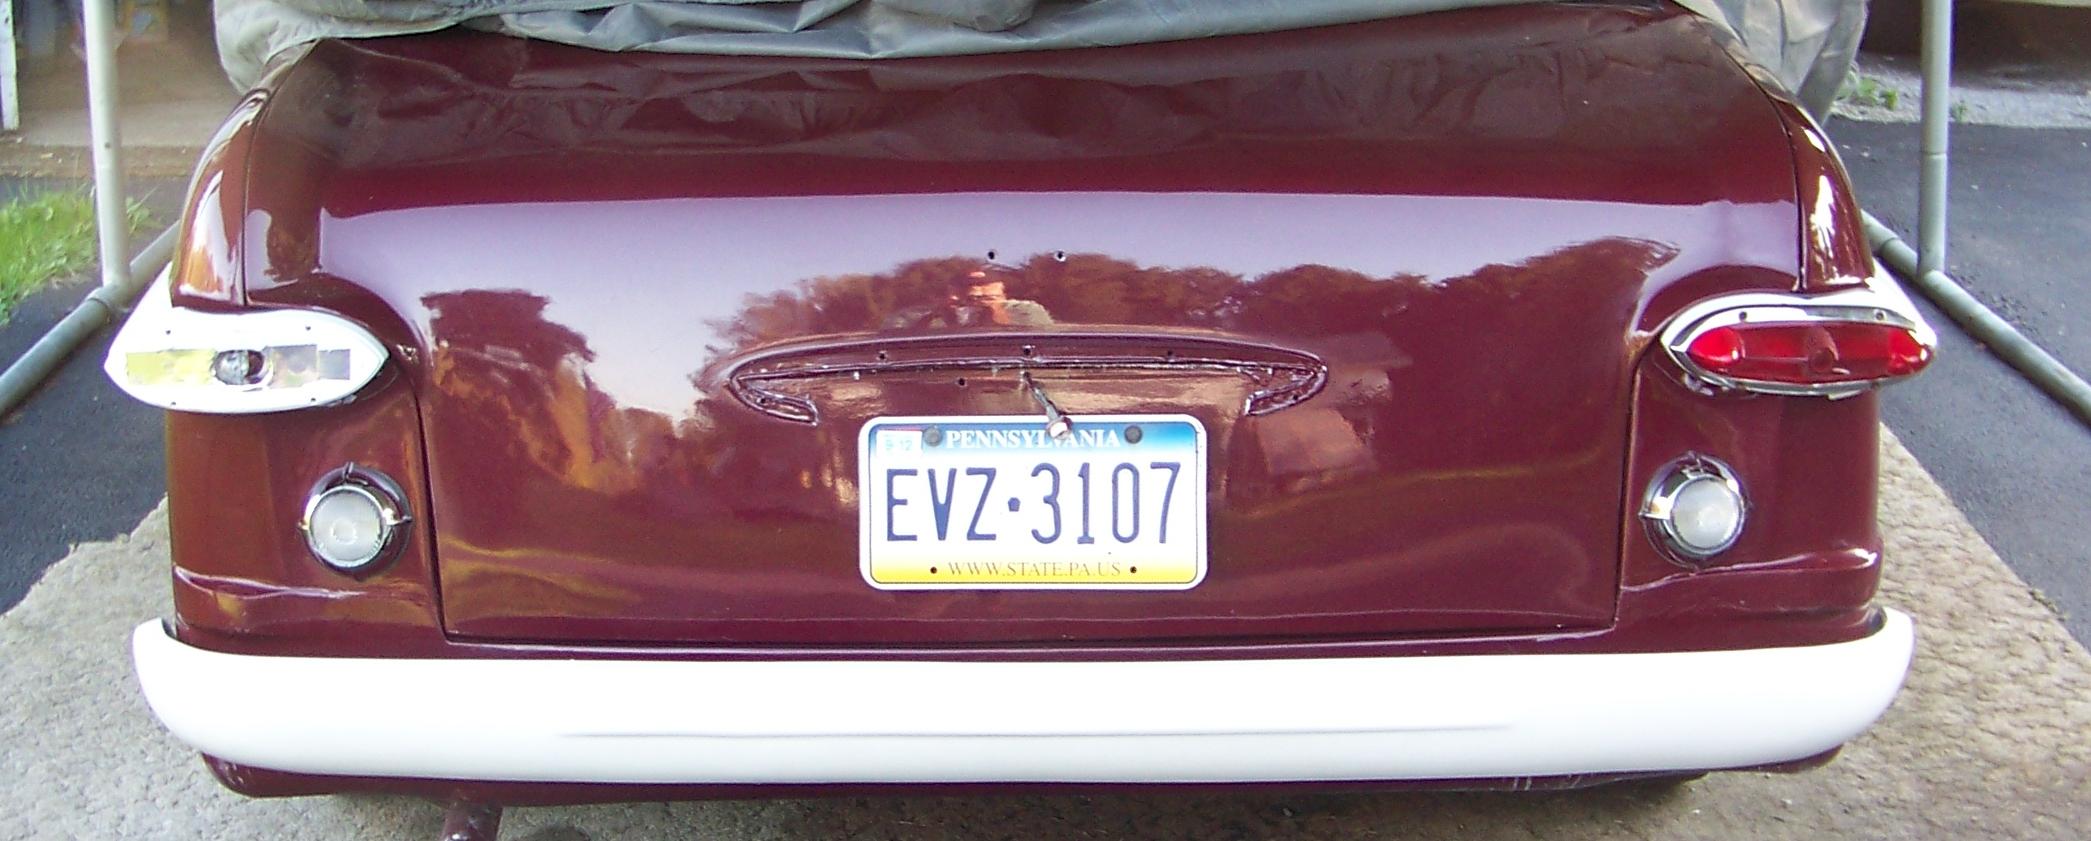
I think I need to lower the bumper about a inch. This can be done using spacers between the bumper and the stubs. This almost worked but only a half inch would fit.
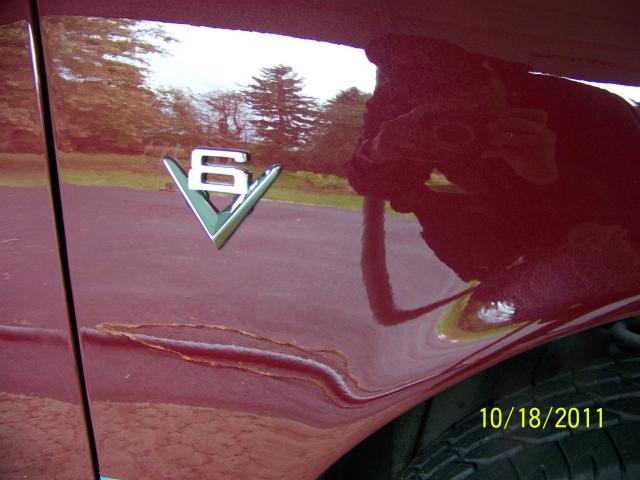
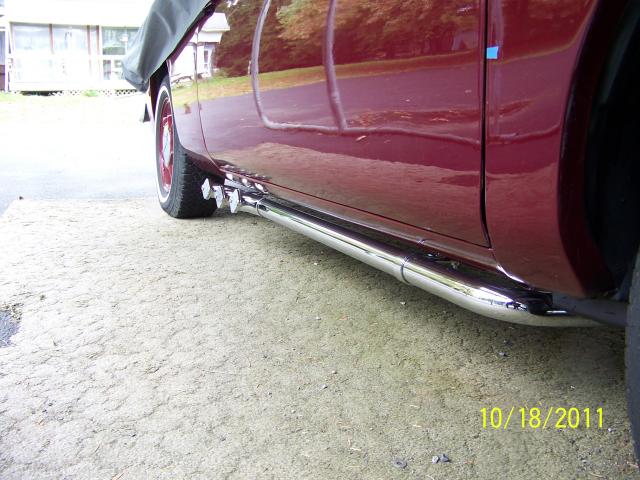
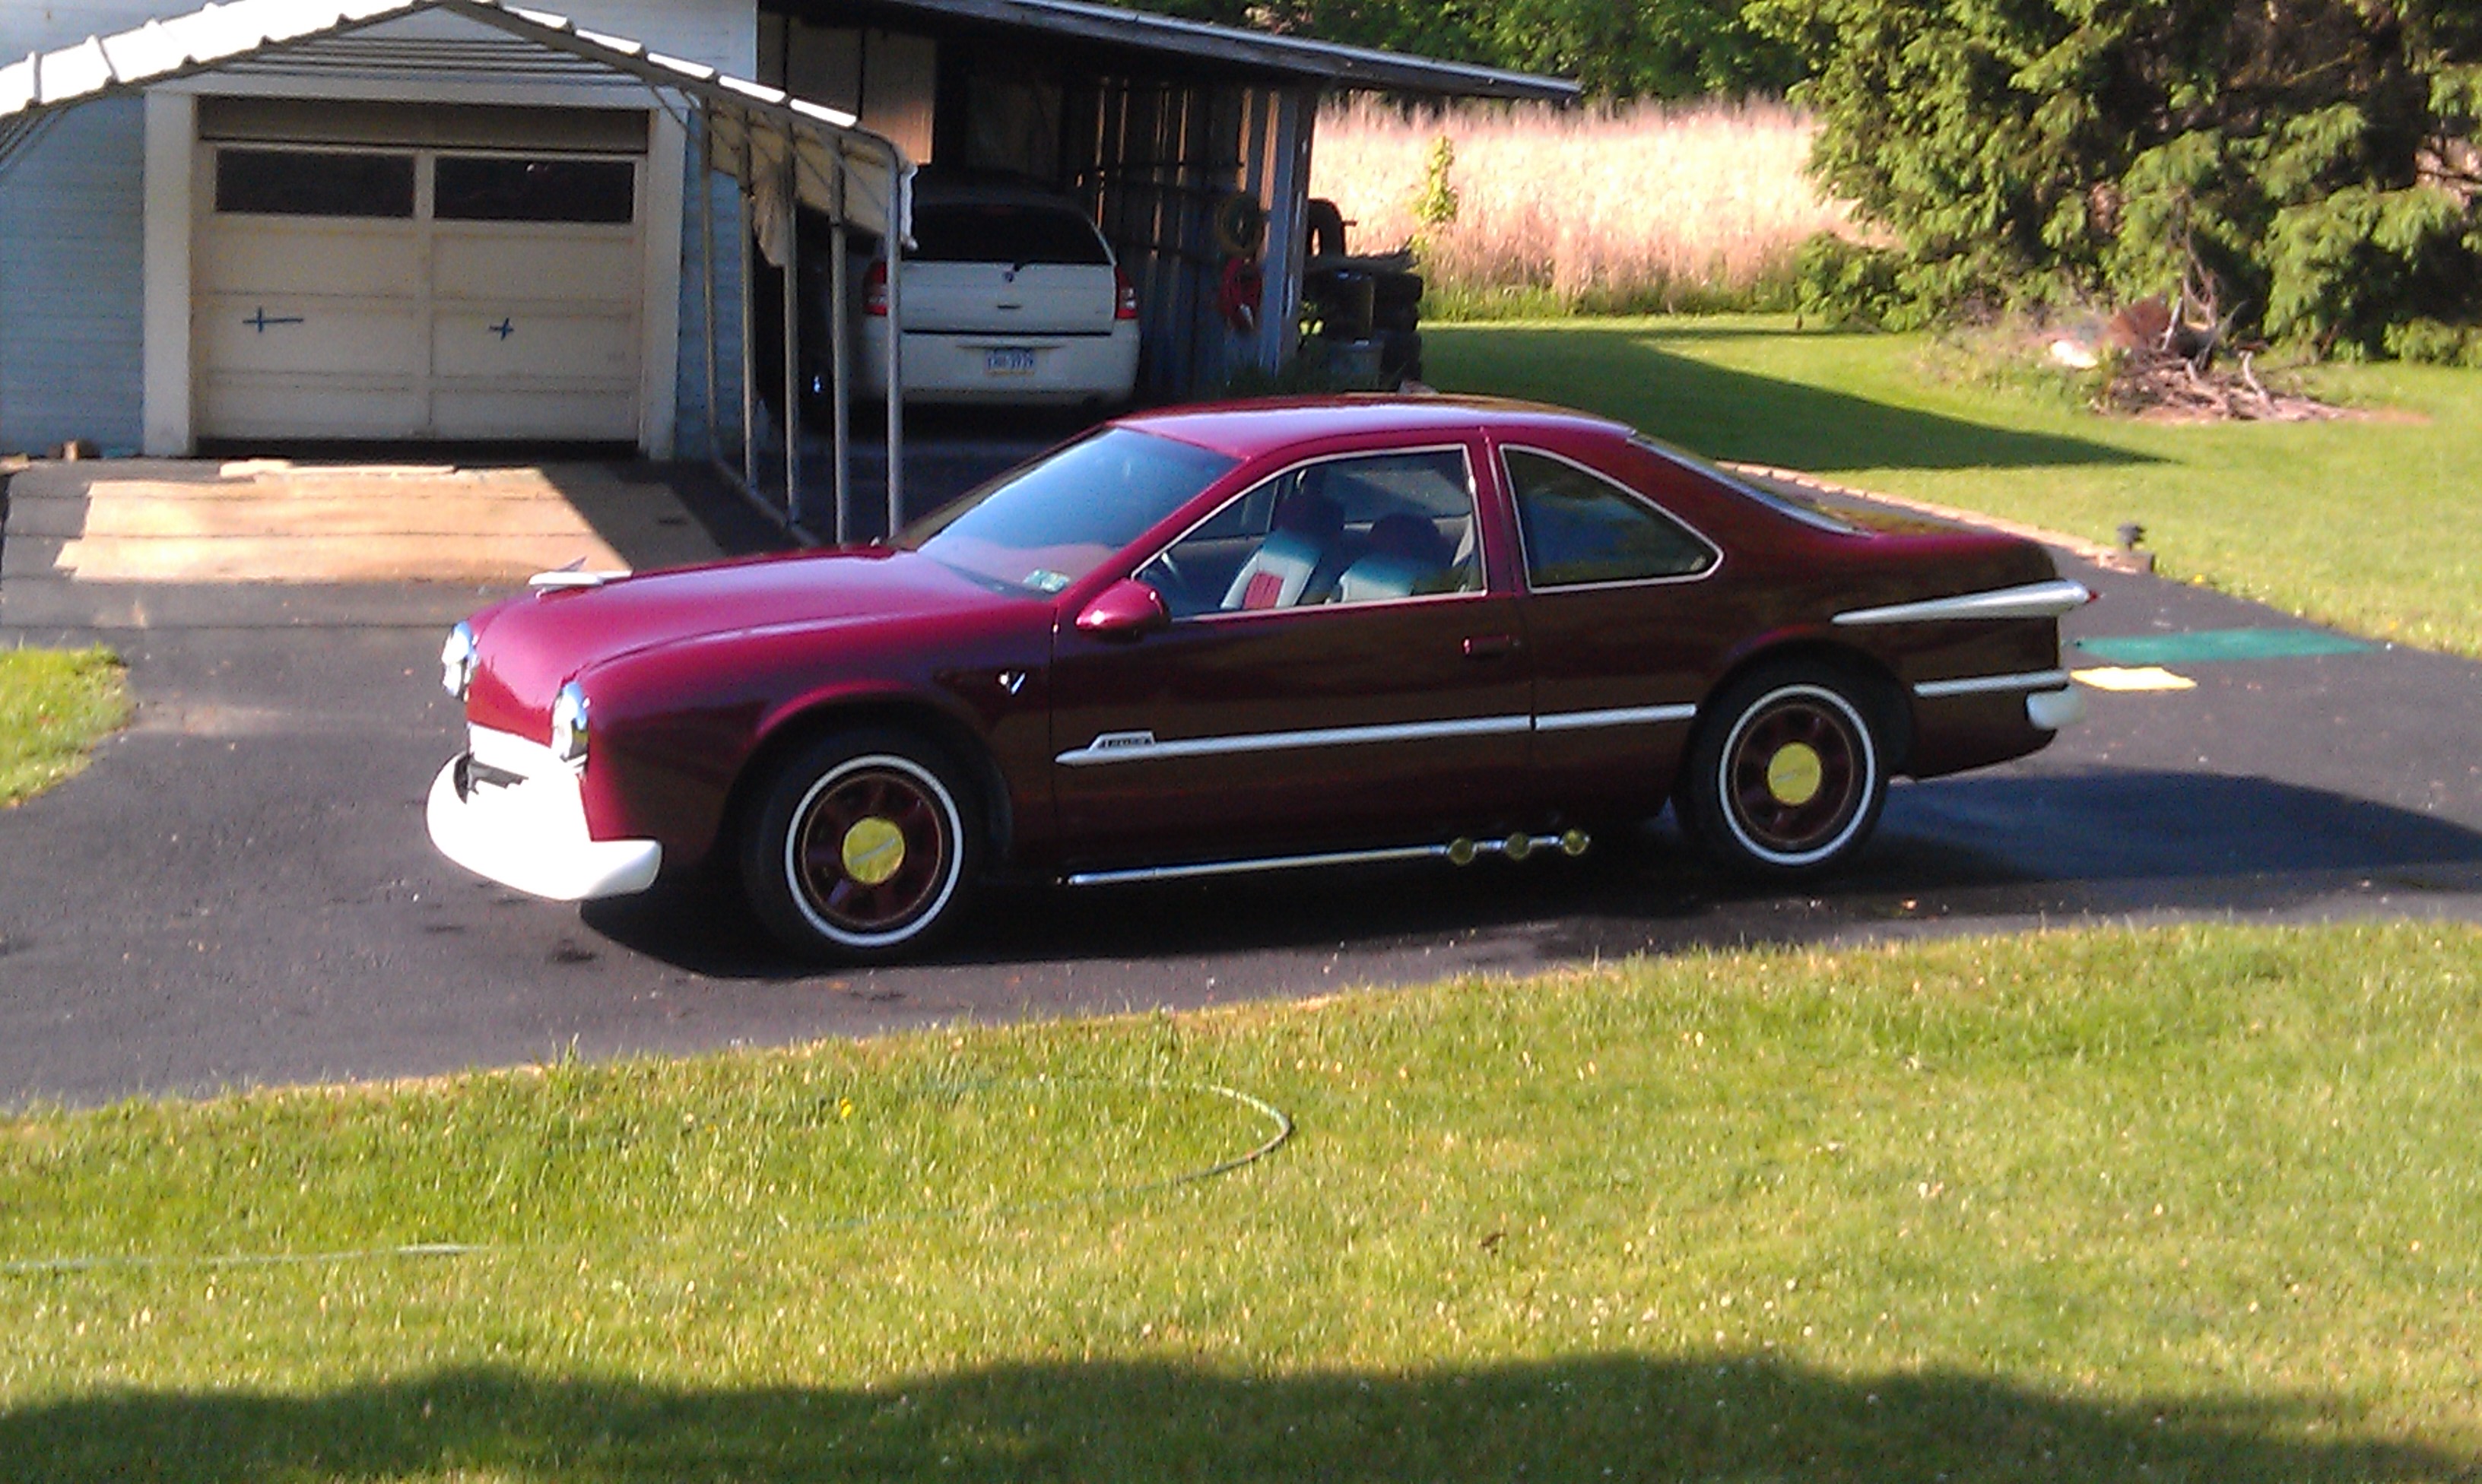
The first image below is a mock up of the side trim. In the second the lake pipe triple exhaust is shown. I am not really happy with the front position and I'll work on that hanger. If you look close you can also see the V-”6” emblem which is actually a V-8 with a small modification.
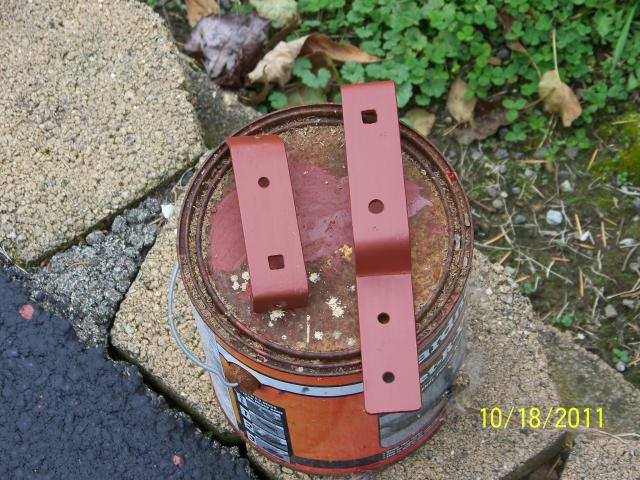
I looked and the emblem really doesn't show up very well so I have included another picture. I finished installing the driver side lake pipe. There is a picture of the parts I made to hang the pipes. The smaller one works on the front the other is for the rear. These are used to mount the chrome bracket that actually mount the pipes. They are made out of 1¼”x1/8” steel stock. I had enough for one side so I had to buy another piece and now I have the same amount left as I did when I started. Now I know why nothing ever gets used up.
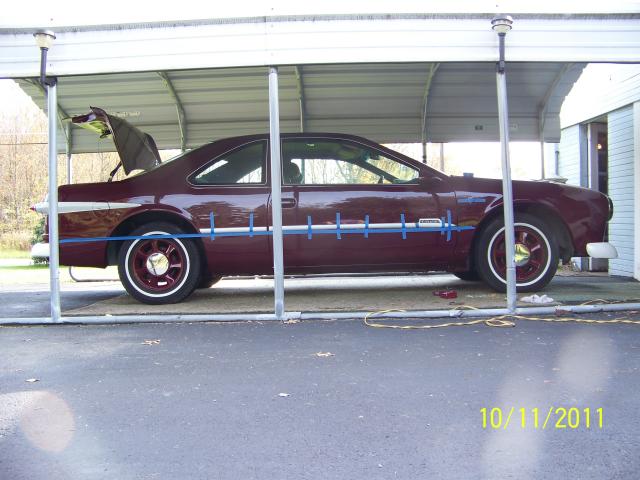
Yes Alan, I still paint things with the red stuff. :) The bit of blue tape marks the proposed level for the side trim.
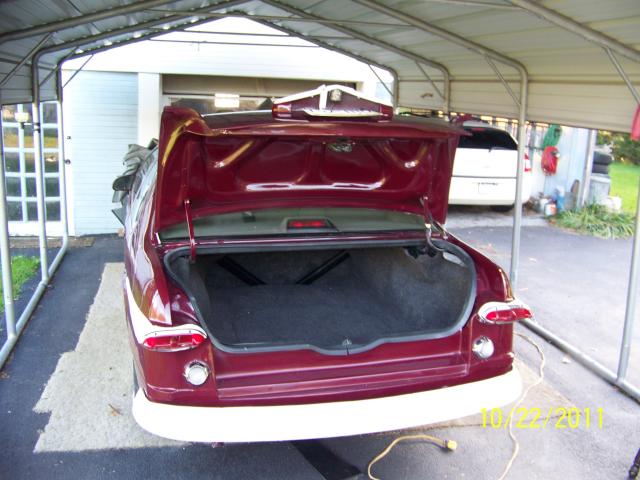
I spent this day attaching an original '51 trunk handle and connecting its lock to the Thunderbird trunk latch. The trunk handle also includes the license plate light.. I was able to use the T-bird wiring and socket with the '51 light fixture.
Greg and I have been working on the wheel stripe. Here are some pix. I'm leaning toward the double stripe.
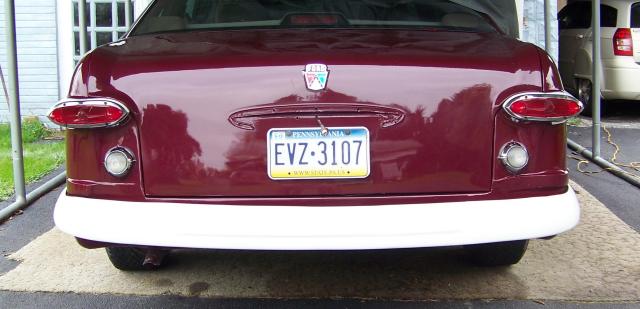
I have also put a filler strip between the rear bumper and the car body. I would like to cover the edge against the car with a piece of split tubing. I'm working on this. Done.
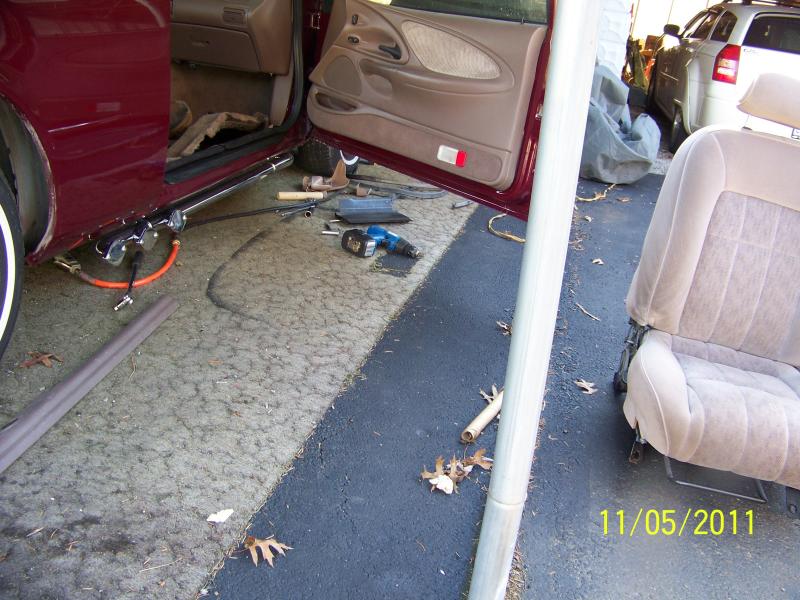
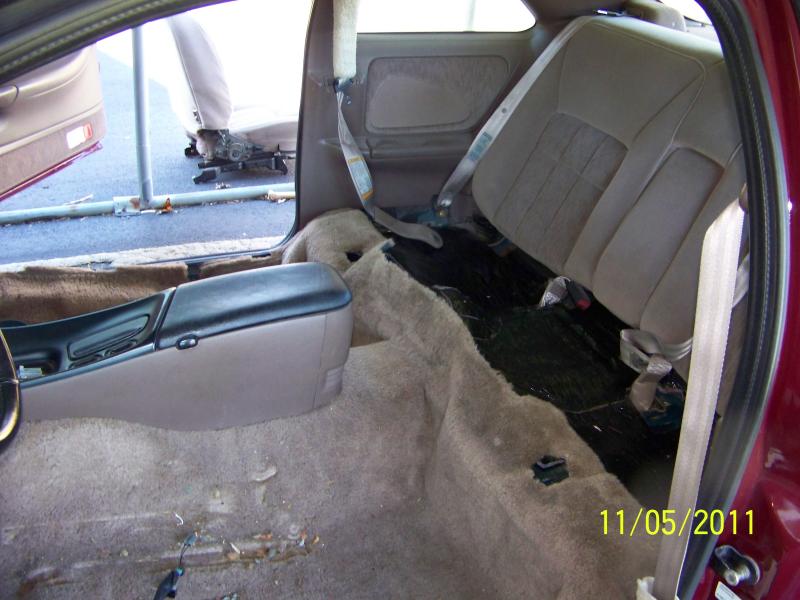
I replaced the multi-function switch and I no longer have the problem of the wipers stopping when the left turn signal is used. I also discovered the the interior lights and the power windows were not working. The windows are on a circuit breaker not a fuse. I took the breaker apart and discovered that the points were so corroded that there was no contact. After cleaning them the windows worked. The fuse for the interior lights was blown and when replaced it blew out immediately. This indicates a short. After three days of trying to find the short I was talking to Alan and he “suggested” maybe I had run a screw into a wiring bundle when I was mounting the Lake Pipes. To check this out I needed to remove the seats and pull back the carpet. Sigh, he was right!
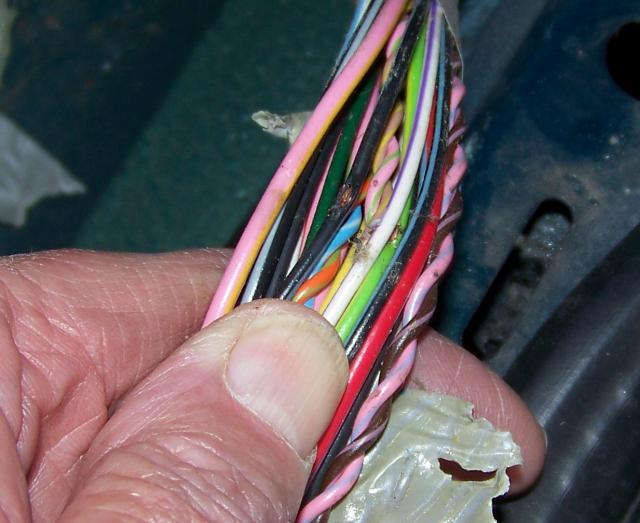
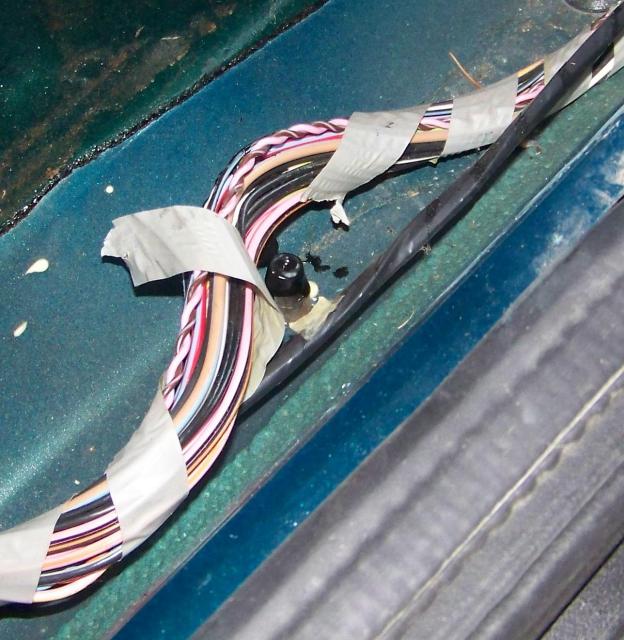
The first picture shows the damaged wiring. If you look close you can see the green with yellow strip wire and the black wire are showing copper. These are the interior lights power wire and the ground wire. To fix the problem I pushed short pieces of rubber tubing over the offending screws and repaired the insulation with a few coats of liquid vinyl and tape. The fuse doesn't blow now and the interior lights work. I coincidently fixed another problem during this process. Since I bought this car the driver's side seat would not recline. I actually thought maybe it wasn't supposed to. When I took the seat out and was tipping it around and very bedraggled 1989 quarter fell out and now the seat reclines just like the passenger seat. :)

Next step is the fender/wheel well inserts and side trim.
5/8/2012
I haven't yet got to the above but I have the interior done. The next pictures show the interior as it was. I never really liked the interior. Ford tried to make the interior colors so the four or so they had would go with nearly any exterior color. Mine was sort'a tan and now around 18 years old. I decided that I wanted a more interesting scheme.
I found an ad in our weekly Area Shopper for Mark's Upholstery. It said they worked on upholstery from homes to cars to airplanes. I decided to pay him a visit and ask for advice on what to do and hopefully get an estimate. Mark was very helpful and gave me some good advice. We looked through MANY sample books and finally decided on a gray/burgundy mix. His estimate was acceptable. I stripped out the front and rear seats along with the door panels and the rear speaker trim panels. He called to tell me they were complete about 2 weeks later.
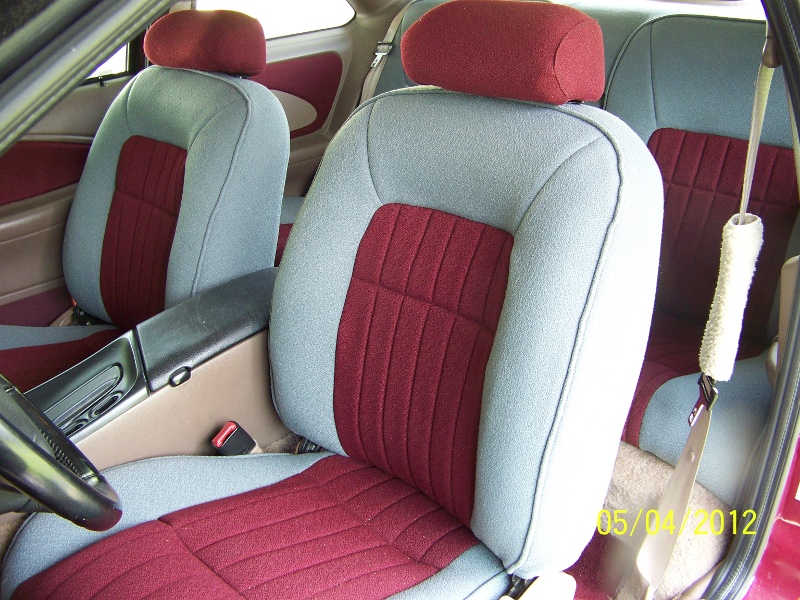
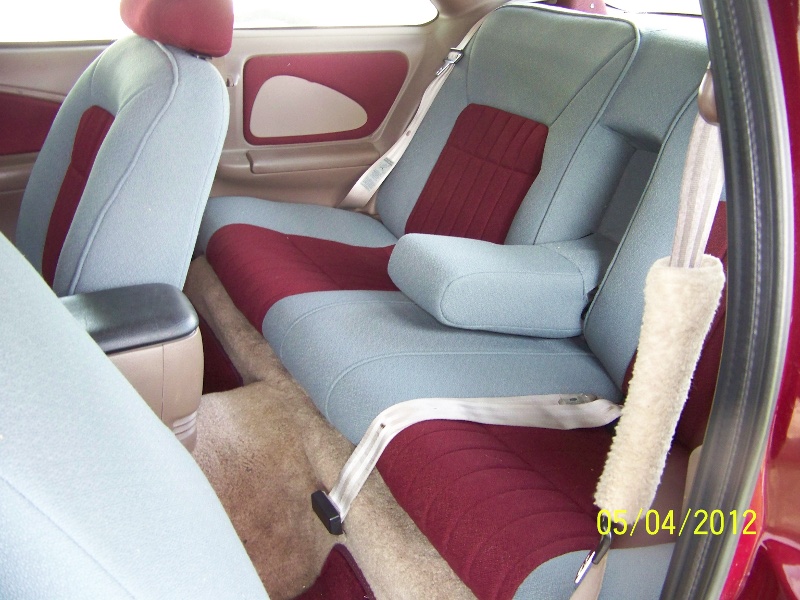
I am well satisfied with the result and the seats are comfortable to sit in also.
The bodyman who painted my car has been very busy and finally found time to paint my fender inserts. I had installed the trim strips on the side of the car but needed the inserts to complete the look I wanted. Here are some pictures.
The first is without the fender inserts and the second is with the insert and trim. The trim strip runs continously around just as it does on a '51. Since the front fenders are not wide enough to hold the spears I moved the spears back onto the doors.